After 11 Robot Framework lessons, we already know what the .robot file contains, how keywords run, where variables are, and which log to read when a test fails. Now it's time to take out the phone and plug it into the computer.
Mobile testing is more annoying than browser automation in that there are quite a few layers standing in between the test case and the application. If any layer isn’t installed, has the wrong version, or points to the wrong path, Robot Framework will report an error on this side, while the real cause is all the way over at ADB on the other side. This article will build each layer one by one so that when an error occurs, you’ll know which layer to grab.
The baseline of the article was checked according to the documentation and package registry on 08/09/2026. The installation part has been verified with dry-run and build; the smoke flow still needs to be run on the real device before removing the draft status.
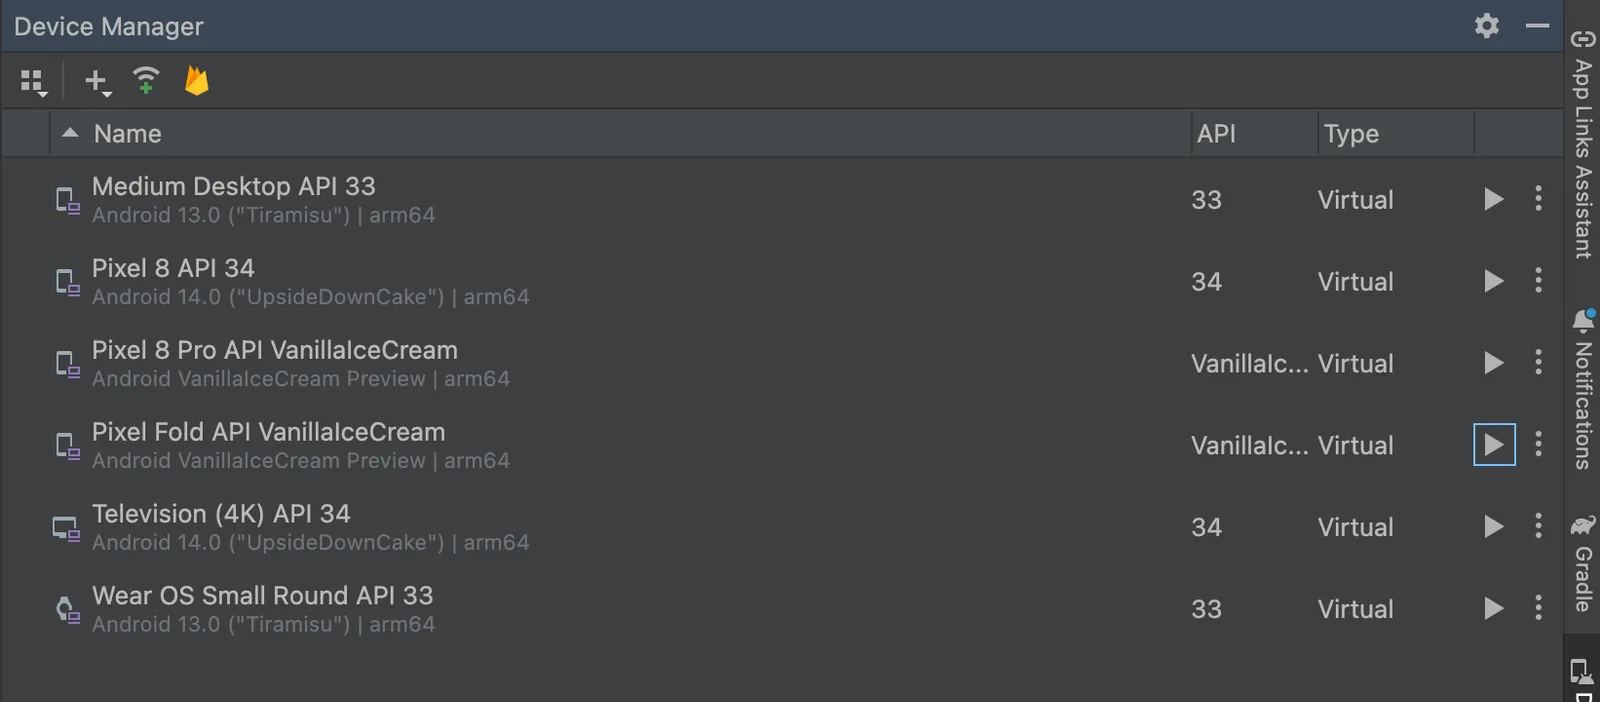
Device Manager is the place to create, boot, and manage AVDs. Image: Android Developers, used under Content License. This interface only illustrates the AVD flow, not a smoke test evidence of the project.
Six layers are talking to each other
Robot Framework reads test cases and orchestrates keywords. AppiumLibrary transforms keywords like Click Element into commands of the Appium Python Client. The client sends HTTP requests to the Appium Server. The server forwards commands to the UiAutomator2 Driver, and the driver uses ADB to install a helper server on Android and control the interface.
In short, Robot Framework does not know how to tap on the phone screen by itself. It delegates tasks through four intermediate layers. Therefore, pip install robotframework-appiumlibrary succeeding only means that the Python layer has completed, not that the phone is ready.
Version set used in the article
| Component | Version used as baseline | Why needed |
|---|---|---|
| Python | 3.13.x | Run Robot Framework and AppiumLibrary |
| Robot Framework | 7.4.2 | Test runner and keyword engine |
| AppiumLibrary | 3.2.1 | Connect Robot Framework with Appium Python Client |
| Node.js | 22.12 or above | Run Appium 3 and UiAutomator2 Driver |
| npm | 10 or above | Install Appium and drivers |
| Appium | 3.7.0 | WebDriver server |
| UiAutomator2 Driver | 8.6.1 | Appium's Android driver |
| JDK | 17 | Build and run Android components that require Java |
| Android SDK | Latest Platform Tools, API 35 for AVD | Provide ADB, emulator, and Android platform |
The version in the table is not an eternal truth. It is a set that has been finalized so that the later sections speak the same language. If you update Appium on your own but keep the old driver from three seasons ago, when an error occurs, don't rush to conclude that Robot Framework hates you.
Install Python dependencies in a virtual environment
Create the project folder, virtual environment, and activate it:
New-Item -ItemType Directory -Path robot-android
Set-Location robot-android
py -3.13 -m venv .venv
.\.venv\Scripts\Activate.ps1
If PowerShell blocks the activation script, just change the policy for the current terminal process:
Set-ExecutionPolicy -Scope Process -ExecutionPolicy Bypass
.\.venv\Scripts\Activate.ps1
You don’t need to change the whole machine’s policy just to enable a virtual environment. If you’re using a knife to peel fruit, don’t casually chop the whole table.
Create requirements.txt:
robotframework==7.4.2
robotframework-appiumlibrary==3.2.1
Then install and check:
python -m pip install --upgrade pip
python -m pip install -r requirements.txt
python --version
robot --version
python -m pip show robotframework-appiumlibrary
Using python -m pip helps ensure pip belongs to the correct Python in .venv. If you type a pip floating on the PATH, you might install the library into Python A, but VS Code and Robot Framework run Python B. He says chicken, she imports AppiumLibrary.
Install Node.js, Appium, and UiAutomator2
After installing Node.js 22, check:
node --version
npm --version
Install the correct Appium baseline, then install the separate Android driver:
npm install --global appium@3.7.0
appium driver install uiautomator2@8.6.1
appium --version
appium driver list --installed
Appium 3 does not automatically bring UiAutomator2 along. npm install --global appium only installs the server; appium driver install installs the thing that knows how to control Android. This is where newcomers often stop the earliest and then look at the Could not find a driver for automationName 'UiAutomator2' line with a hurt gaze.
Install JDK and Android SDK
Install JDK 17, then open Android Studio and go to Settings → Languages & Frameworks → Android SDK. In the SDK Manager, install:
- Android SDK Platform 35;
- Android SDK Platform-Tools;
- Android SDK Command-line Tools;
- Android Emulator if you use AVD;
- a system image API 35 suitable for CPU if you use AVD.
Suppose the JDK is located at C:\Program Files\Eclipse Adoptium\jdk-17 and the Android SDK is located at %LOCALAPPDATA%\Android\Sdk, set the environment variable for the current user:
[Environment]::SetEnvironmentVariable(
    'JAVA_HOME',
    'C:\Program Files\Eclipse Adoptium\jdk-17',
    'User'
)

[Environment]::SetEnvironmentVariable(
    'ANDROID_HOME',
    "$env:LOCALAPPDATA\Android\Sdk",
    'User'
)
Add the necessary directories to Path using the Environment Variables interface of Windows:
%JAVA_HOME%\bin
%ANDROID_HOME%\platform-tools
%ANDROID_HOME%\emulator
%ANDROID_HOME%\cmdline-tools\latest\bin
Mở terminal mới rồi kiểm tra:
java -version
adb version
where.exe java
where.exe adb
JAVA_HOME points to the JDK directory, not directly to java.exe. ANDROID_HOME also points to the SDK directory, not to platform-tools. The new PATH is where you put the directories containing executables so that the terminal can find them.
Finally run doctor:
appium driver doctor uiautomator2The goal is 0 required fixes needed. Optional fixes can be read later; if the required fix is still red, tests should not be written yet.
Method A: real Android device via USB
On your phone, open Settings → About phone, tap Build number multiple times until Developer Options are enabled. Go back to Developer Options and turn on USB debugging.
On Windows, some manufacturers require OEM USB drivers. If Device Manager only sees the phone as a media device or shows a warning icon, install the driver from the manufacturer. Don't download a universal-super-adb-driver-final-final.exe file from some dark corner of the Internet and hope for the best.
Plug in the cable with data transfer, unlock the phone, and accept the RSA dialog Allow USB debugging. Check:
adb devices -lThe good result takes the form:
List of devices attached
R58M123456A    device product:... model:... transport_id:1
The first part of the line is the serial. It will be used as udid:
$env:ANDROID_UDID = 'R58M123456A'
$env:ANDROID_TARGET = 'usb'
Capability deviceName does not select a device in UiAutomator2. When there are multiple targets, using udid is the correct way to specify the device that needs to be controlled.
Method B: Android Emulator in Android Studio
Open Tools → Device Manager → Create Virtual Device, select Pixel 7, system image API 35, and name the AVD Pixel_7_API_35. Start the AVD, wait until the home screen is usable, then check:
adb devices -l
adb -s emulator-5554 shell getprop sys.boot_completed
adb devices may appear as device before Android has finished booting. Only when the second command returns 1 should an Appium session be initiated.
Set the target for the terminal to run the Robot:
$env:ANDROID_AVD = 'Pixel_7_API_35'
$env:ANDROID_TARGET = 'avd'
If you plug in a real phone while opening the emulator, always pass udid or avd. Letting Appium choose the 'first device' is a game of chance that brings no reward.
Preparing ApiDemos
Download ApiDemos-debug.apk from the official AppiumLibrary sample repository and place it into demoapp\ApiDemos-debug.apk in the project. There are two ways to install:
adb -s $env:ANDROID_UDID install -r .\demoapp\ApiDemos-debug.apkOr let Appium install using the app capability when opening a session. This article uses the second method so that a newly cloned project can prepare the app by itself.
First smoke test
Create smoke.robot:
*** Settings ***
Library    AppiumLibrary
Suite Teardown    Close All Applications

*** Variables ***
${APPIUM_URL}    http://127.0.0.1:4723
${APK}           ${CURDIR}${/}demoapp${/}ApiDemos-debug.apk
${TARGET}        %{ANDROID_TARGET=avd}
${UDID}          %{ANDROID_UDID=}
${AVD}           %{ANDROID_AVD=Pixel_7_API_35}

*** Test Cases ***
ApiDemos Can Open The Search Screen
    Open ApiDemos On The Selected Target
    Wait Until Page Contains Element
    ...    id=io.appium.android.apis:id/txt_query_prefill
    ...    timeout=10s
    Capture Page Screenshot    smoke-search.png

*** Keywords ***
Open ApiDemos On The Selected Target
    IF    $TARGET == 'usb'
        Open ApiDemos On A USB Device
    ELSE IF    $TARGET == 'avd'
        Open ApiDemos On An AVD
    ELSE
        Fail    ANDROID_TARGET must be 'usb' or 'avd', got '${TARGET}'
    END

Open ApiDemos On A USB Device
    Should Not Be Empty    ${UDID}    ANDROID_UDID is required for USB
    Open Application
    ...    ${APPIUM_URL}
    ...    platformName=Android
    ...    automationName=UiAutomator2
    ...    udid=${UDID}
    ...    app=${APK}
    ...    appPackage=io.appium.android.apis
    ...    appActivity=.app.SearchInvoke
    ...    autoGrantPermissions=${TRUE}

Open ApiDemos On An AVD
    Open Application
    ...    ${APPIUM_URL}
    ...    platformName=Android
    ...    automationName=UiAutomator2
    ...    avd=${AVD}
    ...    app=${APK}
    ...    appPackage=io.appium.android.apis
    ...    appActivity=.app.SearchInvoke
    ...    autoGrantPermissions=${TRUE}
The keyword coordinating selects the correct branch from ANDROID_TARGET. The USB branch must have ANDROID_UDID; the AVD branch uses the virtual device name. The two keywords Open Application are deliberately written in full in the installation article so that you can see where the capabilities differ. In the next article, this repeated section will be consolidated into a dictionary.
Open Application creates a WebDriver session on the Appium Server. platformName indicates this is Android, and automationName selects UiAutomator2. app points to the APK on the machine running Appium. appPackage and appActivity specify the application and the screen to open. autoGrantPermissions is suitable for the sample app; for a real product, it's still necessary to separately check the denial and permission granting flow.
Open the first terminal and run the server:
appiumAppium 3 listens by default at http://127.0.0.1:4723. It does not automatically add /wd/hub; that is the old style base path.
In the second terminal, activate .venv and then run:
robot --outputdir results .\smoke.robotIf the test passes, results will have output.xml, log.html, report.html and a screenshot. This is the milestone for 'setup running successfully', not the milestone for installing the package without any red warnings.
How are real devices and emulators different?
| Part | USB device | Android Emulator |
|---|---|---|
| Android SDK, ADB, JDK, Appium | Same | Same |
| Target preparation | USB debugging, RSA, OEM driver | System image, AVD, hardware acceleration |
| Stable identification | udid from serial | avd=Pixel_7_API_35 or emulator serial |
| Reality closeness | Has real hardware, OEM, and actual policies | Clean environment, easy to reset and change API |
| Common errors | Cable, driver, authorization, OEM policy | Boot, snapshot, RAM, disk, GPU, hypervisor |
Test logic should not know whether it is running on a USB or an AVD. The differences should only lie in the capability or variable file. In the next lesson, we will separate this part so that the same script can run on both.
Final checklist
python --version
robot --version
node --version
npm --version
java -version
adb version
adb devices -l
appium --version
appium driver list --installed
appium driver doctor uiautomator2
If all the above commands are fine and the smoke test can create a session, the setup is complete. If not, don't jump straight to fixing the XPath. XPath is not to blame in the adb case when it hasn't even seen the phone.
Verification status of the draft: Robot Framework syntax has been dry-run and the site has been built; the smoke flow has not been run on a real USB device or AVD in this iteration. Therefore, I keep
draft: true, not pretending to turn a compile-able piece into proof that the device has successfully run it.